
Choose the right Intex model
Intex hot tubs fall into three main lines: PureSpa, SimpleSpa, and Lay-Z-Spa. Pick the line that matches your seating needs and feature priorities before you worry about installation.
PureSpa is the premium line. It includes bubble massage jets, a digital control panel, and an insulated cover. SimpleSpa strips the features down to the basics. Lay-Z-Spa focuses on durability and capacity, often using thicker vinyl and more robust inflation systems.
Start by counting how many people sit in the tub regularly. Two people fit in a 2-3 person model. Four people need a square 69-inch footprint. Six people require a round 80-inch model. Capacity matters more than jet count for comfort.
| Line | Capacity | Key Features | Best For |
|---|---|---|---|
| PureSpa | 4-6 people | Bubble jets, LED lights, wireless control | Feature-rich relaxation |
| SimpleSpa | 2-3 people | Basic heating, no jets | Small spaces, budget |
| Lay-Z-Spa | 4-6 people | Thick vinyl, AirJet system | Durability, larger groups |


As an Amazon Associate, we may earn from qualifying purchases.
The choice between these lines depends on your usage frequency. PureSpa offers the most comfort for regular users. SimpleSpa works for occasional dips. Lay-Z-Spa provides the best balance of size and build quality for families.
Prepare the site and inflate
Setting up Intex hot tubs requires more than just blowing air into the chambers. The foundation determines whether your spa lasts for years or collapses after a few months. A stable, level base prevents the vinyl from stretching unevenly, which is the most common cause of leaks in inflatable models.
Start by clearing the installation area of sharp objects like stones, sticks, or debris. Even small pebbles can create pressure points that weaken the material over time. Intex hot tubs are sensitive to ground irregularities, so a perfectly flat surface is non-negotiable for long-term stability.
Place a protective ground cloth or a dedicated inflatable spa base under the tub. This layer acts as a barrier against moisture and abrasion, significantly extending the lifespan of your Intex hot tub. Without this cushion, the vinyl is directly exposed to dirt and friction, leading to premature wear.

Once the base is secure, connect the air pump to the inflation valve. Inflate the support rings until they feel firm to the touch, but avoid over-inflating. Over-pressurization can stress the seams and cause the tub to bulge or burst. Follow the manufacturer’s guidelines for pressure levels to ensure the structure remains rigid and safe.
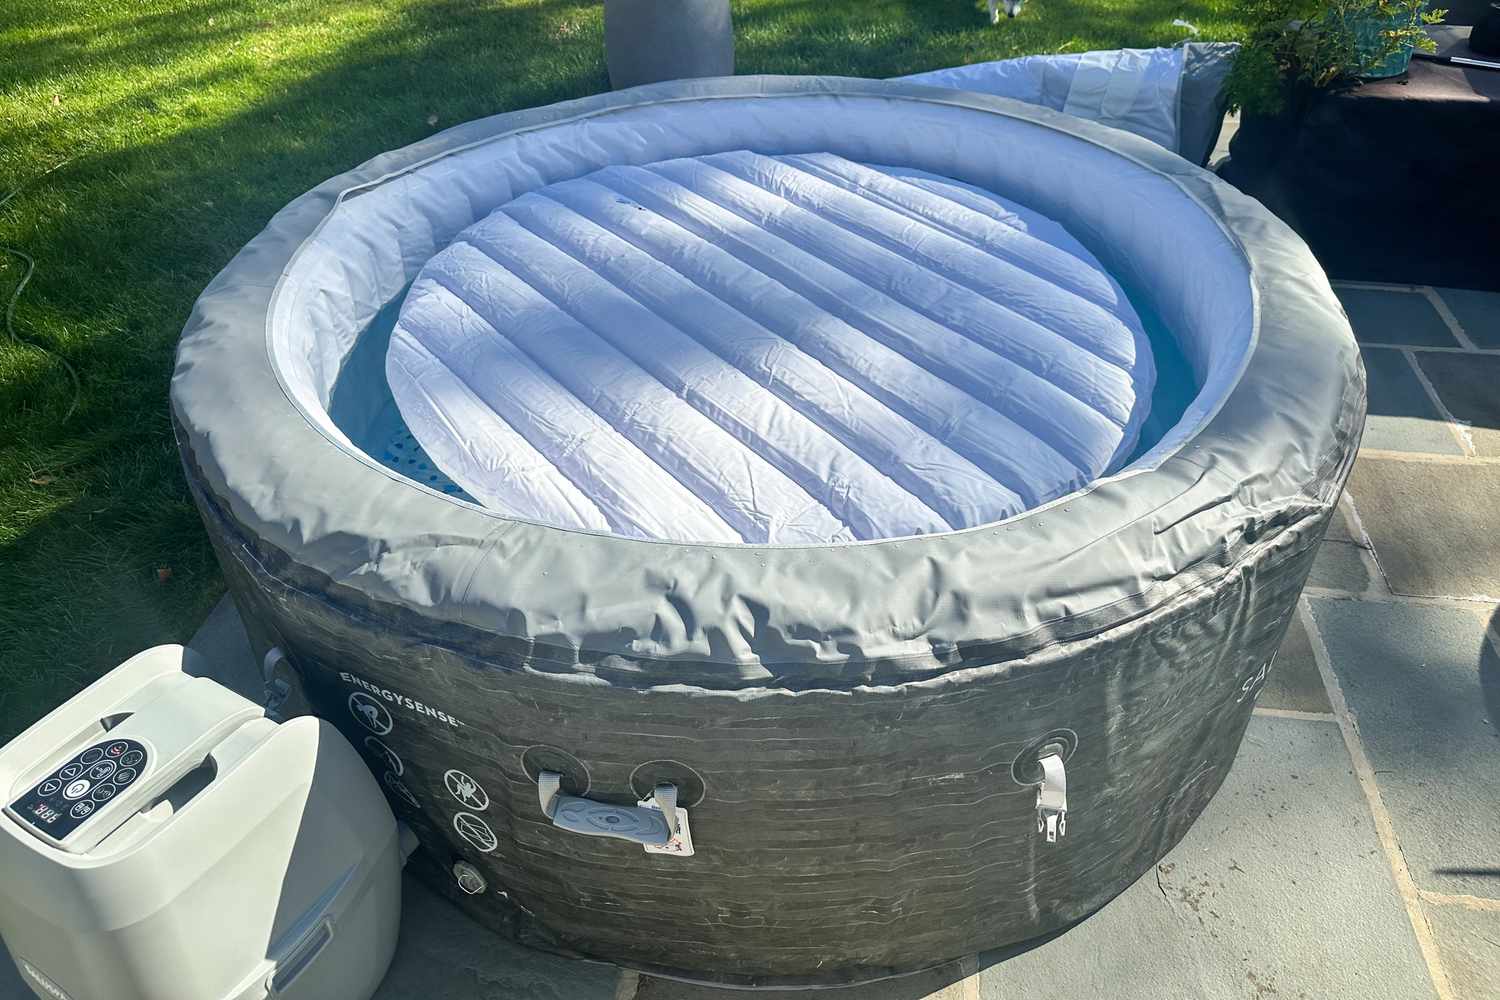
Connect power and fill with water
Before you can enjoy your Intex hot tubs, you need to establish a safe electrical connection and fill the tub to the correct level. Skipping these steps or rushing the process is the fastest way to damage the pump or void the warranty. Follow this sequence to get your spa running correctly.

Once the system is running, monitor it for the first hour to ensure stable operation. Proper setup now prevents costly repairs later, helping your Intex hot tubs last for years rather than just a single season.
Balance water and add salt
Intex hot tubs rely on a stable chemical environment to keep the water clear and safe. The PureSpa series is designed to work with a salt water system, which converts standard table salt into chlorine through an electrolytic cell. This process maintains sanitation without the harsh smell of traditional chlorine tablets, resulting in softer skin and eyes.
Before adding salt, test the water pH and alkalinity. The ideal pH range is 7.2 to 7.6. If the levels are off, adjust them with pH increaser or decreaser before proceeding. Adding salt to unbalanced water can lead to corrosion or cloudy water, defeating the purpose of the system.

Maintain the salt level by testing it monthly. Over time, water evaporation can concentrate the salt, so top off with fresh water as needed. Regular testing ensures your Intex hot tub remains a relaxing sanctuary without chemical imbalances.
Add privacy screens and accessories
Inflatable hot tubs like the Intex PureSpa often sit in open yards or tight urban lots where neighbors can easily look in. Privacy isn’t just about comfort; it’s about letting guests relax without feeling watched. The good news is that you don’t need to build a permanent structure to create a secluded spa area. Simple, modular screens can turn your backyard into a private retreat.
Install modular privacy screens
Freestanding privacy screens are the easiest way to block sightlines without drilling into decks or fences. Look for bamboo, reed, or vinyl panels that clip together. These panels snap around the base of your Intex hot tubs, creating a visual barrier that’s sturdy enough to stay upright in light wind but light enough to move if you need to access the pump or filter.
Add comfortable accessories
Once your privacy is sorted, focus on comfort. Intex hot tubs come with basic headrests, but adding a dedicated cover or a cushioned seat pad makes a big difference. A thermal cover keeps heat in when the tub is empty and adds a layer of visual privacy from above. Soft, waterproof cushions provide lumbar support that the inflatable walls alone can’t match.
Use outdoor rugs and lighting
Define your spa zone with a waterproof outdoor rug. This anchors the space and prevents bare feet from touching cold concrete or grass. Pair this with solar-powered string lights or lanterns. These add ambiance without the complexity of electrical wiring, keeping the setup simple and safe for an inflatable tub environment.

Maintain and store for winter
Proper winterization is the single most important factor in extending the life of your Intex hot tub. While many inflatable spas are discarded after a few years due to neglect, consistent maintenance can push their lifespan to five years or longer. The goal is simple: prevent water from freezing inside the lines and protect the PVC material from UV degradation when the tub is not in use.
Winterize the plumbing
Freezing water expands, which can crack the internal pumps and heating elements. To prevent this, you must drain the tub completely. Remove the bottom filter and any remaining debris. Use a wet/dry vacuum to suck out any residual water from the pump housing and jets. If you live in an area with harsh winters, consider adding non-toxic RV antifreeze to the pump lines for extra protection. Always consult your specific model’s manual for the recommended antifreeze type and quantity.
Clean and dry before storage
Once the tub is empty, it needs to be thoroughly cleaned and dried. Use a mild, non-abrasive cleaner to scrub the interior and exterior surfaces. Rinse well and allow the tub to air dry completely in a shaded area. Moisture trapped inside folds can lead to mold or mildew during storage. Check the vinyl for any small leaks or tears; repairing these now prevents them from worsening over the winter. If you have a cover, clean it according to the manufacturer’s instructions and ensure it is dry before placing it back on the tub.
Store properly
If you are storing the tub for the off-season, fold it neatly according to the original packaging instructions. Store it in a cool, dry place away from direct sunlight, as UV rays can degrade the PVC material over time. Avoid placing heavy objects on top of the folded tub. If you plan to keep the tub set up year-round, ensure you have a high-quality, insulated cover to protect it from the elements and maintain water temperature efficiently.
No comments yet. Be the first to share your thoughts!